EN
EN
 English
 Español
 عربى
عربىContent
- 1 Why a Marine Amplifier Is Not the Same as a Car Amplifier
- 2 Key Specifications to Understand When Comparing Marine Amplifiers
- 3 Weather Resistance Ratings Explained
- 4 Choosing the Right Marine Amplifier for Different Boat Types
- 5 Marine Amplifier Installation: What You Must Get Right
- 6 Top Features That Separate Premium Marine Amplifiers from Budget Options
- 7 Maintaining Your Marine Amplifier for Maximum Lifespan
Why a Marine Amplifier Is Not the Same as a Car Amplifier
Many boat owners make the mistake of installing a standard automotive amplifier on their vessel, only to find it fails within a season. The marine environment is dramatically harsher than any road condition — constant exposure to humidity, salt spray, UV radiation, and temperature swings creates a hostile operating environment that standard electronics simply are not built to survive. A dedicated marine amplifier is engineered from the ground up to handle these conditions, using conformal-coated circuit boards, corrosion-resistant hardware, and sealed enclosures that prevent moisture intrusion.
Beyond durability, marine amplifiers are also designed to meet ABYC (American Boat and Yacht Council) and ISO standards for ignition protection. This means their internal components are shielded to prevent sparks that could ignite fuel vapors in enclosed engine compartments — a critical safety requirement that car amplifiers do not meet. Installing a non-marine-rated amplifier near a fuel system can create genuine fire or explosion hazards, making compliance with marine electrical standards a matter of both performance and safety.
Key Specifications to Understand When Comparing Marine Amplifiers
Shopping for a marine amplifier requires understanding a handful of technical specifications that directly affect sound quality, compatibility, and longevity. Misreading these numbers is one of the most common reasons boaters end up with an underpowered or mismatched audio system.
RMS Power vs. Peak Power
RMS (Root Mean Square) power is the continuous output a marine amplifier can sustain during normal playback — this is the number that truly matters. Peak power refers to the maximum wattage delivered in very short bursts and is often inflated by manufacturers for marketing purposes. Always match your amplifier's RMS output to your speakers' RMS handling capacity. For example, if your marine speakers are rated at 75W RMS per channel, pair them with an amplifier delivering 75–100W RMS per channel for clean, undistorted audio without risk of blowing the speakers.
Number of Channels
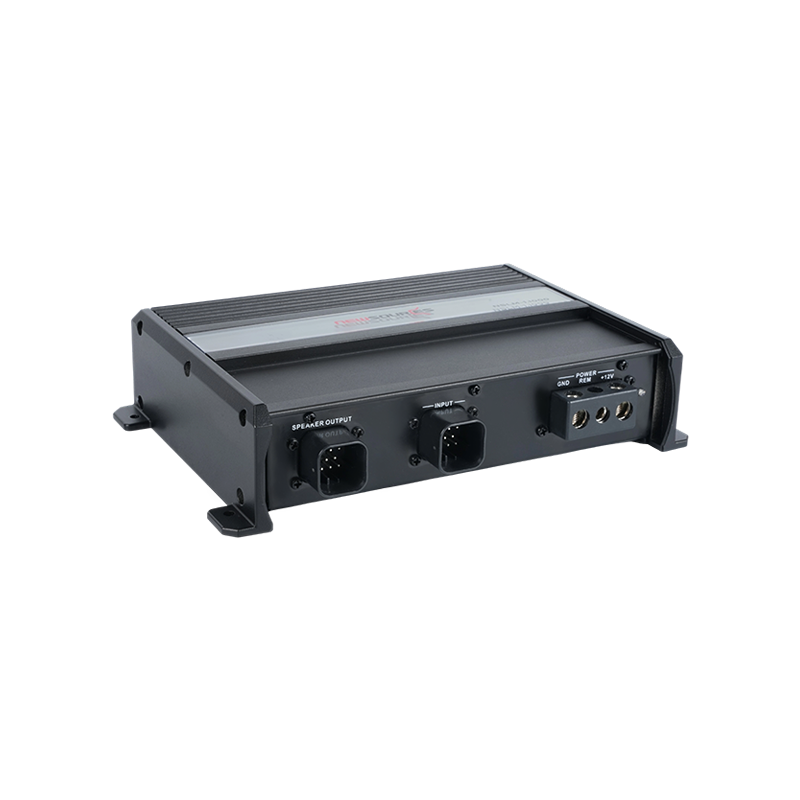
Marine amplifiers are available in mono, 2-channel, 4-channel, and 5-channel configurations. Mono amplifiers are dedicated to subwoofers, delivering high current for low-frequency reproduction. A 4-channel amplifier can power four full-range speakers independently, while a 5-channel unit combines full-range and subwoofer amplification in a single chassis — a space-efficient choice for boats with limited installation room. Choose the number of channels based on your planned speaker layout, accounting for future expansion if you intend to upgrade the system later.
Total Harmonic Distortion (THD)
THD measures the amount of distortion an amplifier adds to the audio signal. Lower is always better — look for a marine amplifier with THD of 0.1% or less at rated power. High distortion not only degrades sound quality but can also damage tweeters over time by sending high-frequency harmonic artifacts to drivers not designed to handle them. Quality marine amplifiers from reputable brands specify THD at their rated RMS output, not at lower test levels where any amplifier will perform cleanly.
Weather Resistance Ratings Explained
Marine amplifiers carry IP (Ingress Protection) ratings that indicate their resistance to water and dust. Understanding these ratings helps you choose the right level of protection based on where the amplifier will be installed on your vessel.
| IP Rating | Water Protection Level | Recommended Installation Location |
| IPX4 | Splash resistant from any direction | Under-console, enclosed cabin |
| IPX5 | Protected against water jets | Semi-exposed deck areas |
| IPX6 | Protected against powerful water jets | Open cockpit, wakeboard tower |
| IPX7 | Submersion up to 1m for 30 minutes | Exposed transom, bilge-adjacent areas |
In addition to IP ratings, look for UV-stabilized housings and stainless steel or nickel-plated mounting hardware. Salt air is corrosive enough to degrade exposed metal over a single season, and UV radiation will yellow and embrittle plastic enclosures that are not specifically formulated for outdoor marine use. Premium marine amplifiers from brands like JL Audio, Wet Sounds, and Rockford Fosgate Marine use powder-coated aluminum chassis and anodized heat sinks that maintain structural integrity across years of harsh-environment operation.
Choosing the Right Marine Amplifier for Different Boat Types
The ideal marine amplifier configuration varies significantly depending on the type of vessel and how it is used. A compact fishing boat has entirely different audio requirements than a wakeboard boat or a cruising yacht.
- Small fishing boats and jon boats: A compact 2-channel marine amplifier delivering 50–75W RMS per channel is typically sufficient. These vessels prioritize simplicity and battery efficiency over audio power, and a modest amplifier paired with two quality marine coaxial speakers delivers clear, conversation-level audio without draining the battery bank.
- Pontoon boats: Pontoons benefit from 4-channel or 5-channel amplifiers due to their open layout and background noise from wind and water. Multiple speaker zones — fore, aft, and possibly a subwoofer — require an amplifier with enough channels and headroom to fill the space. Look for models with independent level controls per channel to balance volume across the deck.
- Wakeboard and surf boats: These boats demand the highest output, often running tower speakers that need 100W RMS or more per channel to be audible at speed with engine noise and wind interference. A dedicated tower amplifier or a high-power 4-channel unit is standard, often complemented by a mono amplifier driving a marine subwoofer mounted in a sealed in-boat enclosure.
- Cruising and offshore yachts: Long-range cruisers typically have dedicated cabin entertainment systems in addition to cockpit audio. Multi-zone marine amplifiers with network control capability allow audio distribution from a single source unit to multiple zones, controllable via helm-mounted keypads or mobile apps. Power efficiency is also important on yachts that rely on battery banks during anchor stays.
Marine Amplifier Installation: What You Must Get Right
A properly specified marine amplifier can still fail prematurely or sound poor if installed incorrectly. The installation environment, wiring practices, and grounding approach all play decisive roles in long-term performance and reliability.
Ventilation and Heat Management
Marine amplifiers generate substantial heat under load, and in an enclosed boat compartment, heat buildup can trigger thermal protection shutdown or cause component degradation over time. Always install the amplifier in a location with adequate airflow, leaving at least 2–3 inches of clearance above the heat sink. Avoid mounting in bilge areas or any space where standing water or condensation is likely to accumulate, even if the amplifier carries an IPX6 or IPX7 rating — extended immersion exposure will reduce the lifespan of any electronics.
Wiring Gauge and Fusing
Undersized power wiring is one of the leading causes of marine amplifier failure and potential fire hazards. Use tinned marine-grade copper wire — standard automotive wire uses bare copper that corrodes rapidly in saltwater environments. For amplifiers drawing 30–50 amps, use a minimum 8-gauge power cable with a fuse or circuit breaker rated to the wire's capacity, installed within 18 inches of the battery terminal. Ground connections must be made to the boat's common ground bus, not to a random metal surface, to prevent ground loops that introduce audible hum into the audio signal.
Signal Cable Routing
Route RCA signal cables away from power wiring to prevent electromagnetic interference that manifests as alternator whine through the speakers. Run signal cables along the opposite side of the hull from power cables, and use shielded RCA cables designed for marine use. If whine persists after proper routing, a ground loop isolator inserted in the RCA signal path will eliminate the noise without affecting audio quality.
Top Features That Separate Premium Marine Amplifiers from Budget Options
Once you move beyond entry-level marine amplifiers, a set of premium features becomes available that significantly improves both usability and sound quality. These features are worth the investment for serious boaters who spend significant time on the water.
- Built-in digital signal processing (DSP): DSP allows precise tuning of equalization, crossover frequencies, time alignment, and signal delay — all critical for optimizing sound in the acoustically challenging open-air boat environment. Some marine amplifiers include manufacturer-specific DSP tuning software accessible via USB or Bluetooth.
- Variable crossover controls: High-pass and low-pass crossover filters built into the amplifier allow you to direct the correct frequency range to each speaker type — preventing bass frequencies from damaging tweeters and keeping midrange signals away from the subwoofer for cleaner, more defined audio reproduction.
- Auto turn-on via signal sensing: Rather than relying on a remote turn-on wire from the head unit — which can be difficult to route on some vessels — signal-sensing turn-on automatically powers the amplifier when an audio signal is detected, simplifying installation significantly.
- Bluetooth or network control: Higher-end marine amplifiers support wireless gain and EQ adjustment via smartphone apps. This is especially useful on large vessels where physically accessing the amplifier during playback would be inconvenient.
Maintaining Your Marine Amplifier for Maximum Lifespan
Even the most rugged marine amplifier benefits from routine maintenance that extends its operational life and preserves audio performance. After each outing in saltwater, rinse the exterior of the amplifier housing with fresh water if it has been exposed to spray, and dry it with a clean cloth. Inspect all wiring connections at least once per season for signs of corrosion — green or white oxidation on terminals increases resistance and can cause voltage drop that reduces amplifier output and generates heat.
Apply a thin coat of dielectric grease to all electrical connections, including RCA jacks, power terminals, and speaker connections, to form a moisture barrier that dramatically slows corrosion. Before winter storage, disconnect the amplifier from the power supply and store it in a dry, temperature-stable environment if the boat will sit unused for extended periods. Many marine electronics failures occur during storage when condensation cycles repeatedly through components — proper winterization protects your investment and ensures the system performs reliably when the next boating season begins.